Data Room#
Chiller startup via web interface#
Caution
Do not install the side panels until the chiller is running and flow is confirmed (Steps 1-4 below).
Overview
Bring the chiller online and confirm flow is nominal before allowing the instrument to come up to thermal stability.
Procedure
Open the chiller web interface from the data room workstation (http://10.200.130.100/supervisor/).
Confirm “NGPS” shows as the installed instrument.
Click start button; observe ramp up then flow / pressure stabilizing.
Verify flow rate is within nominal range (~16 GPM) (Figure 47).
After this is done, install side panels on NGPS electronics rack.
Photo references
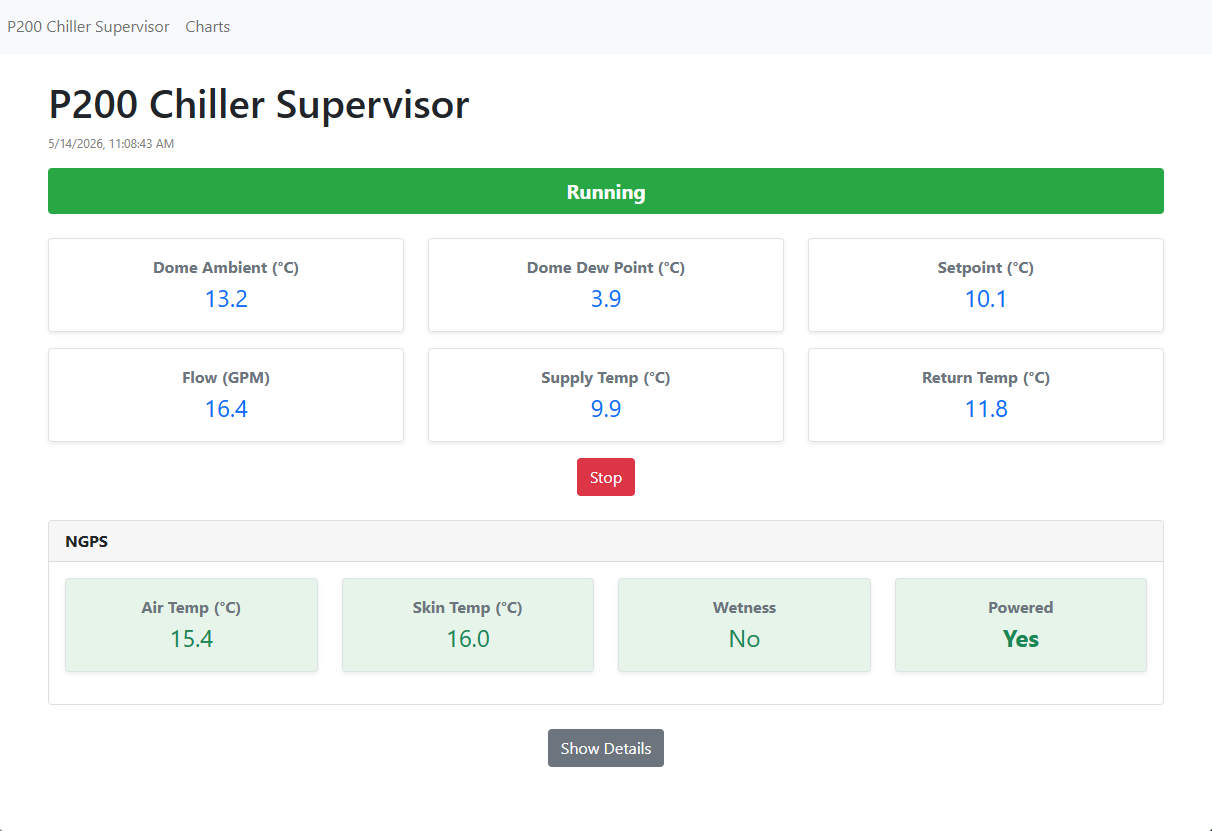
Figure 48#
TCS configuration, instrument and station#
Overview
Configure the Telescope Control System (TCS) for NGPS as the active instrument and select the appropriate observing station.
Procedure
Open the TCS instrument-selection panel (http://10.200.99.2/configs.php).
Set instrument to NGPS (Figure 48).
Set station to F16 CASS (if NGPS is primary instrument).
Photo references
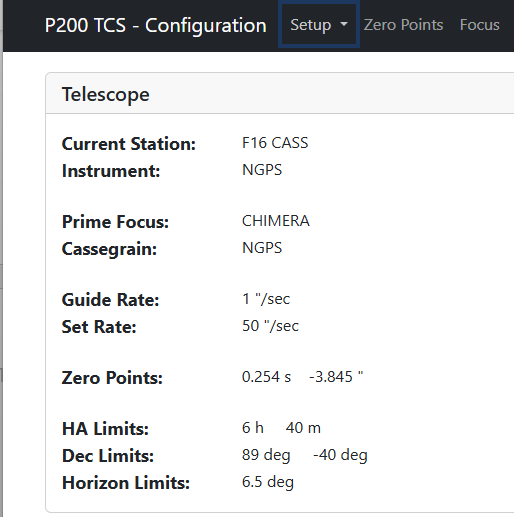
Figure 49#
Balance, perform / “dial-in”#
Overview
Balance the telescope with NGPS installed either by 1) Setting Selsun dials for this exact configuration of instruments and racks if not older than 6 months or 2) Performing a full balance per Elab procedure.
Tools and materials
PalOps balance page (http://10.200.160.100/balance) (Figure 49)
Balance cart
Mobile balance ladder
Procedure
Physically inspect all racks and compare to last known good balance (less than 6 months old) for the exact instrument and rack configuration at the Cassegrain Cage and Prime Focus stations.
IF there is a matching non-expired balance THEN set the Selsun dials according to the balance sheet and “set as current” balance. This will send an email notification to Darkside and Elab.
IF there isn’t a matching balance or it is expired THEN perform a full balance per Elab protocol within the PalOps balance worksheet.
Photo references
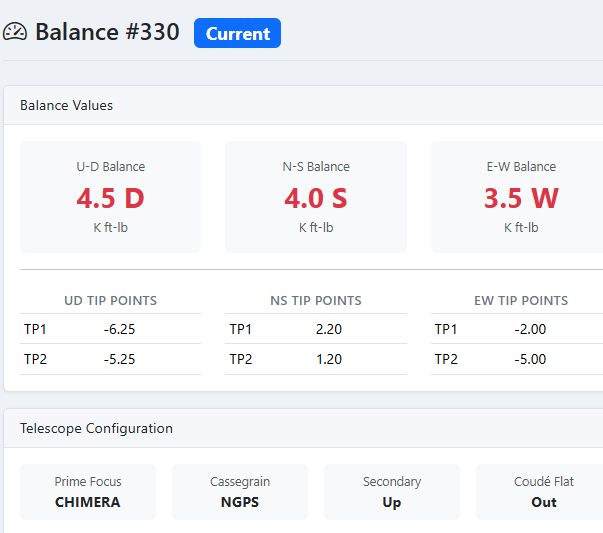
Figure 50#
Final Checklist#
Once balance is completed, perform the final checkout.
Procedure
Sign-in to PalOps (http://10.200.160.100/login) and complete the NGPS checkout.
Photo references
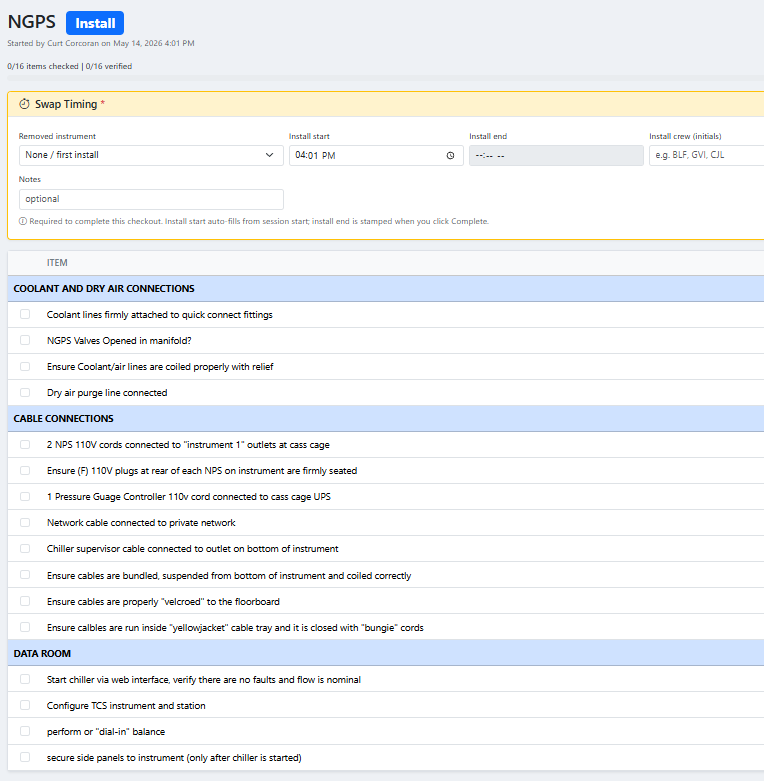
Figure 51#